Grow At-Home with SmokeeeJ and Drogado del Gato, Pt. 2 – Equipment
By Adrian Ryan @drogado_del_gato with @Smokeeej
The home cultivation has started! Smokeeej and I have popped our seeds with election results being certified. I will be growing the following strains: Ace of Spades, 3rd Dimension, Pineapple Chunk, and Blood Diamond. Smokeeej will be growing the other four strains which are: Space Bomb, Space Chunk, Deep Purple, and Thunderfuck Mountain. We begin our next lesson on application of outlined germination methods and what to expect. I am using the rock wool method of germination, which is outlined here:
I started by de-chlorinating my tap water by letting it sit uncovered in a bucket for 24 hours, this will be my normal water supply.
Wearing gloves, I then brought the pH of my water to around 5.0 using pH Up and pH Down, checking it with a pH pen frequently.
I add some root booster from Algas Pacific, @algaspacific, stir, then leave my rock wool to soak for 24hrs.
After soaking the rock wool for 24hrs, I start my seeds in a cup to soak in hydrogen peroxide. I will do this for at least 20 minutes to clean and break down the outer shell membrane.
While the seeds soak, I put my prepared rock wool into my clean tray.
I rinse the seeds in distilled water and drop them into my rock wool. I push them into the medium, about a 1/4 to 1/2 inch so the tap root can emerge easily.
I label my seed areas, and top the tray with its humidity dome. I then put them into a clean area, lined with mylar for heat and light insulation, with a seedling heating pad. I will leave them to sprout for up to 10 days, checking daily.
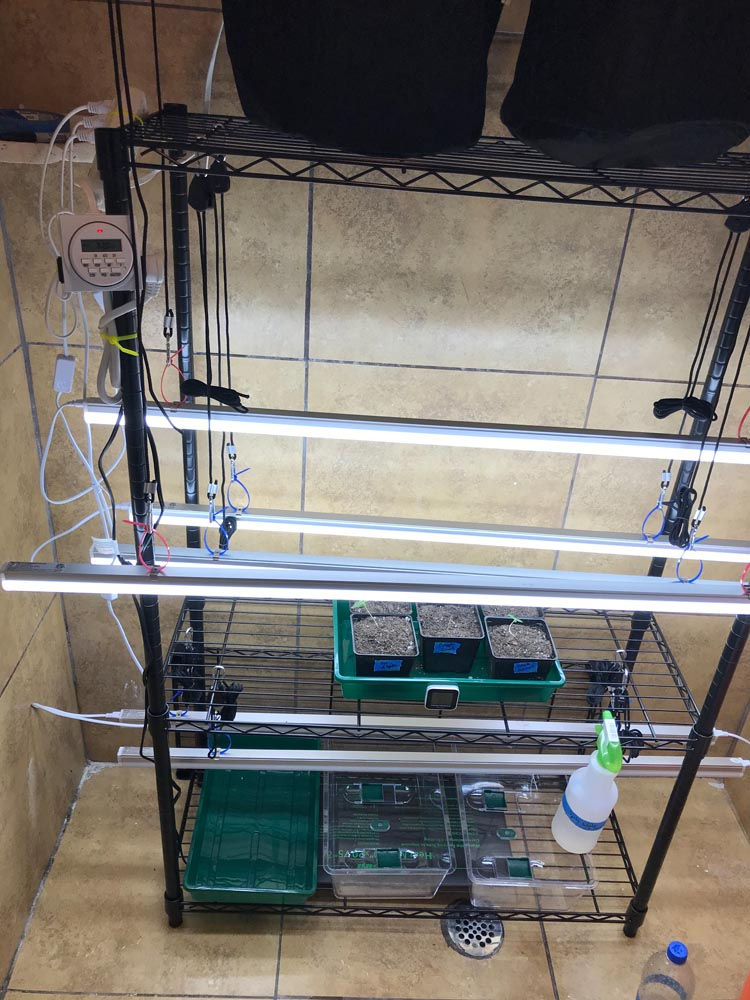
I wanted to explore how I prepared my space, my house is a 1920’s brick build in the Coronado District of Phoenix, Az. It is getting cold, so I will have a heating pad under my tray with dome, and the germination in rockwool will happen over 10 days to root and enter light, if the tap roots are successful. My germination area will be under a sink in my half-bathroom, and I might seal the window off with mylar for light leak to be safe. I will go over what I did to prepare and some of the gear used to create this. To follow along or grow with us, download the Cannabis Cactus App and click the Connect Tab, for full tutorials, gear, and frequent updates. You can also follow @smokeeej and access this information at Smokeeej.com. Let’s take a look at some of the equipment needed for the germination process.
5 Gallon Buckets – These will be where we start and soak our rockwool, these can usually be found at a hardware store for cheap. These will also come in handy later for de-chlorinating our tap water. I will buy 2-3 of these buckets, and keep them clean, stored in a clean environment, don’t forget lids. You can also order them online at whatever the lowest price possible.
Rockwool – Next, we have our rockwool which will act as our starter medium. This is an inexpensive starting medium that is easily moved to veg, and eventually transplanted. This will be important to our cloning process as well, so save whatever is left for that process later on. We got ours from @phxhydro after delivery was delayed due to the holidays. Phx Hydro also got us some soil, pots, and General Hydroponics nutrients, and they are now at a new location 3309 W Catalina Dr Suite B, Phoenix, AZ 85017.
Tray with Dome – The tray and dome will be used for the germination and seedling phases; you will need two. One will be where you put your germinating seeds, left in total darkness until they develop. You will then transfer to a second tray and dome that will be under a fluorescent light to grow to the veg stage. Investing in a few of these early might be of benefit as we will use them later on for clones as well.
PH Testing Pen – This will be an important tool from the start to check your ph. for the rockwool to soak in. Later on, you can use it to test the ph. for your feeding solution, soil, and clone mediums.
PH Up & Down – These are used to control the PH of your water, one is an acid, while the other is a base used depending if you need PH raised (base) or lowered (acid).
Heating Blanket – Your germinating seeds will need to remain in a dark place for up to 14 days before they take root. During the cool of winter in Arizona, it is advised to get a heating blanket to nurture your seedlings as they develop should the temperature drop.
Mylar Sheeting – If your germination or veg areas need material to block light leak, or help to prevent pests from entering. Thin, mylar sheeting is advised. This can be mounted easily with gaffers or duct tape to keep light or other dangers out.
Pipettes – These small, easy to calibrate, disposable measuring devices that are great for your PH control or nutrients solutions when accuracy is needed when adding supplements to water.
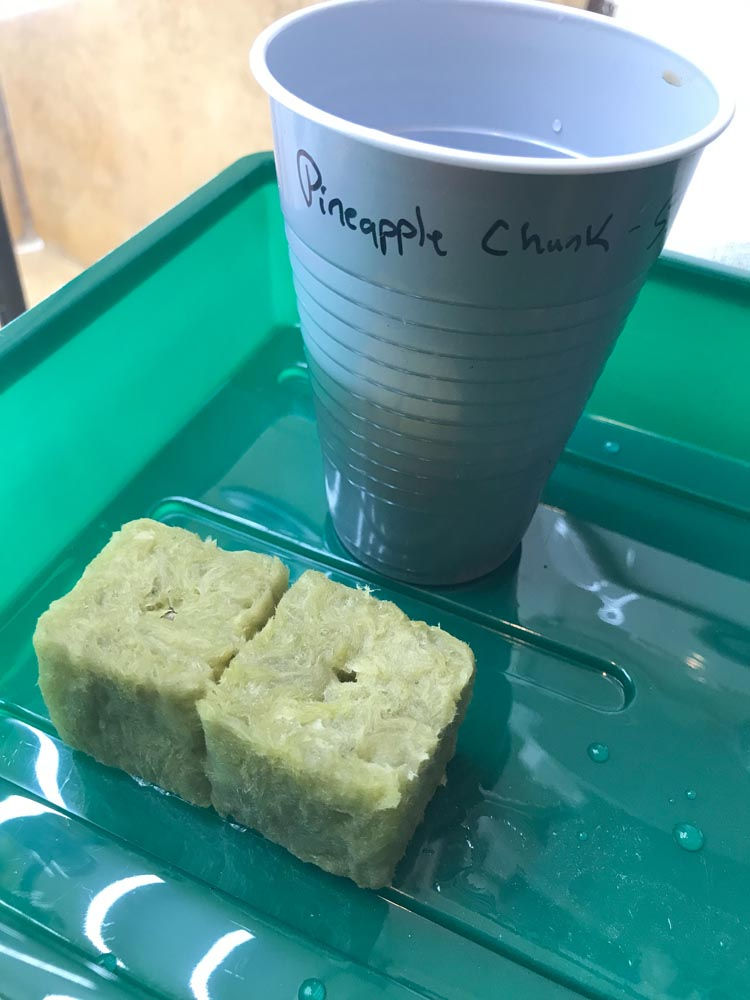
I started by cleaning and clearing the bathroom. I then proceeded to seal off the window using mylar and gaffer’s tape. This is to retain heat, and keep light leak to a minimum. I also used these materials to build a germination area under the sink by removing the pipes, sealing them, lining inside with mylar and the heating pad. The whole process took roughly an hour, and it retains heat and moisture beautifully. Next, we have some basic equipment that will be needed if we are going to also build our vegetative area. The germination process takes about 10 days so that will allow time to set up the veg area. Again, I have sourced all my starting equipment from Amazon to keep price, as well as difficulty for new growers, to a minimum.
Lights – Discussing our propagation and veg lights, I was already looking at some Metal Halide (MH) light similar to what I used a decade ago, when SmokeeeJ suggested fluorescent lights for better heat management. Upon initial investigation I found some hoods that I liked when a fellow cannabis consultant and former neighbor Curtis @crzybaldhead, suggested these LED lights that have the highest light output with 30% less heat, with no yearly bulb replacement. Thank you, Curtis for the UPGRADE!
Hangers – Simple is key, and these will work with the hook anchors I am putting into the ceiling for my top tier of veg lights. I want something I can adjust in case my plants need more or less light to succeed.
Timer – A simple, programmable timer is all you need to set your light schedule. We will go over light schedules in a future post, but for your seedlings, clones, and veg plant, a time cycle of 18hrs light and 6 hours dark is what I will be using. My seeds that are germinating will remain under the sink in darkness to sprout as needed.
Fabric Pots – These are simple, while also removing the weight and clumsiness of traditional pots. These are easy, delivered, and affordable for anyone as they enter the veg stage.
Tray with Dome – The tray and dome will be used for the seedling phases; you will need two as outlined before. One will be where you start your germinating seeds, left in total darkness until they develop. You will then transfer to a second tray and dome that will be under a fluorescent light to grow to the veg stage. Investing in a few of these early might be of benefit as we will use them later on for clones as well!
Shelf – This is a basic shelf but once built out will have my veg and propagation areas clearly defined. My hope is that when or if I need to rearrange my setup, I can do so with ease by using a shelf containing a basic design, photos will be posted upon build completion.
For starters, I’m not using a tent for my veg area, and I’m not opposed but we’re keeping starting costs low. The argument could be made that you don’t really need one except for your flower area. Do what makes sense for your space, budget, and skill level. I will be using a converted half-bathroom which started by cleaning and clearing the bathroom. I then proceeded to seal off the window using mylar and gaffer’s tape. This is to retain heat, and keep light leak to a minimum. Removing the shower curtain, I started mounting my electrical cords and extensions, securing them with 1/2” staples. Following that, I assembled the wire shelf that would fit into the shower, this will be my seedling/clone/veg area. I mount the lights to the ceiling, and underneath the shelves using the hangers so light reaches the pots or trays on shelves below. A wall-mount light timer that has been programmed for 18hrs light, 6hrs dark for my seedling and veg light cycle.
I also purchased cloth flower pots, fiskars, and zip ties to prepare the area. We now want to create an environment in addition to our light. Our dome will take care of itself as seedlings like higher humidity 65%-75%, so be sure to monitor your dome, spraying with 5.0 PH distilled water if needed. As they grow, veg plants can have their humidity lowered gradually. Your space and plants will help determine humidity conditions when filled, but ideally keeping it above 60% humidity. We always want to watch our temperatures in any space we use, keeping them between 70-78 degrees depending on the stage of our plants. Keep a journal to keep track of this information and make improvements based upon your findings. Let’s see what SmokeeeJ is seeing with his grow!
Send in the Clones!
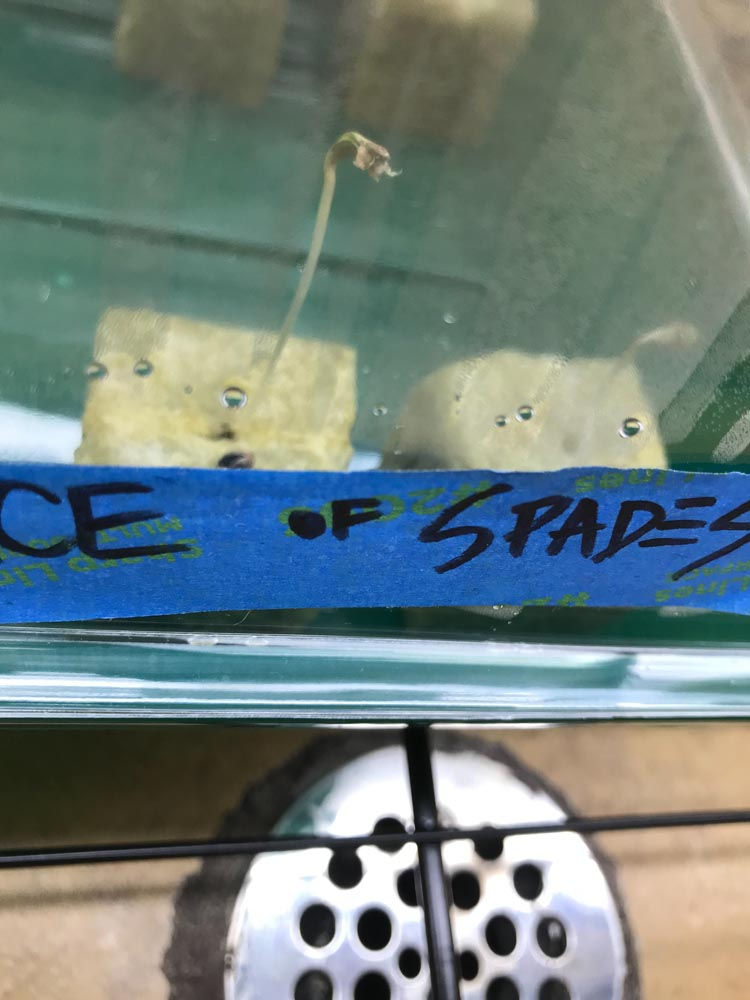
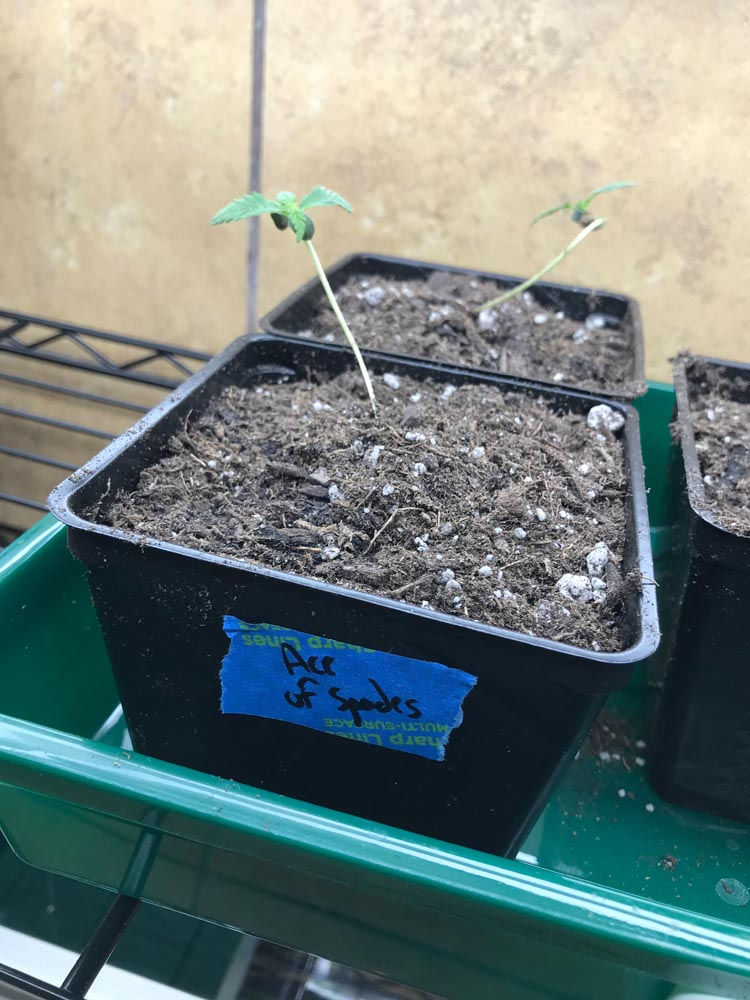
SmokeeeJ used two different methods to pop seeds. The HillBilly Humidity Cub and soaked paper towels in a plastic bag. Both of these methods worked, but unfortunately, only 1 seed survived. There is one lone ThunderFuck Mountain standing tall and growing like a weed. While we love seeds, clones are a better bet for your growing success. There are both pros and cons in using clones and seeds.
Seeds – Pros
Starting from seed usually garners stronger plants
Every Phenotype of seed unlocks different characteristics in the final flower product.
You know (or should know) where the seeds came from. You are starting from seed so you are clean to start.
Seeds – Cons
Time to take from seed to flower is incredibly long
Some seeds may be male and unusable when trying to grow all female flowers
Phenos vary from seed to seed. Even though the parents are the same, no two seeds hold the exact same characteristics
Clones – Pros
Proven Genetics (hopefully) to bring to successful flower over and over
Already a female, no sexing the plant.
You can get clones in various stages:
Cuttings
Rooted Clones
Teens
Mothers
Clones – Cons
Pests. Every time you bring a new plant in from a different grow, you run the risk of invading pests
There are pesticides and herbicides that are systemic and can stay in a clones system for up to 3 cycles.
May not be the strain or lineage as promised
Seed Analysis:
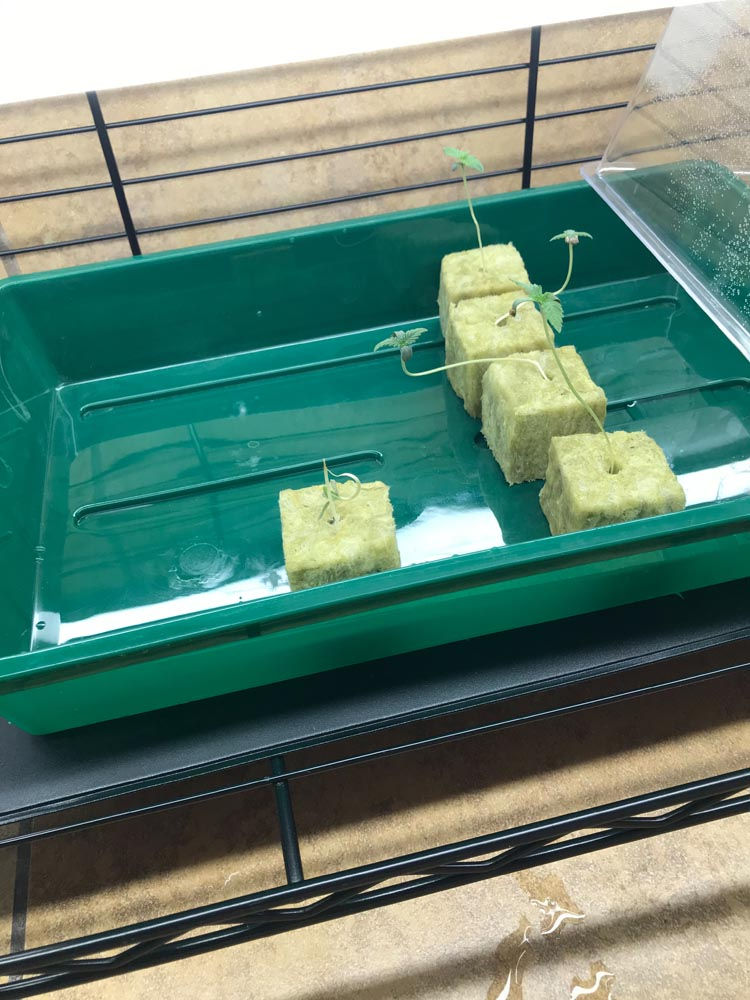
After weighing the pros and cons of using seeds and clones, I decided to use both! Since only 1 of my seeds took root and sprouted leaves, we will be doing another round of germination. In the past when I germinated seeds, I usually used some type of heat pad or it was warm out. I started these seeds right about November 1st and just when it started to get cold. Only one of the seeds hatched in the paper towel and plastic bag (out of 6 seeds) and only 1 of 2 seeds popped in the cups. This next time, we will use a heating pad and keep it in a sealed dark place. More info on seeds to come!
Luckily, a few of my friends in the community had some rather nice clones for me to take on. I was given a Wonka Bars and a Sour Lemon in a teen state of vegetative growth. This means that the roots have a solid mass in the pot and multiple limbs. These plants looked healthy and ready for flowering. However, when I get plants from another grow, we always start with a quarantine period and a treatment of nheem oil.
Quarantine Your Newbies:
When bringing in plants from another grow, you are accepting any problems or issues that go along with that grow. Sometimes the grower knows about the issues and is too proud to say anything and sometimes, the grower just doesn’t know…yet. Grab some Nheem oil from your local grow store and drench those plants with 2-3 treatments over the week while they are secluded from any other plants. Control the pests before they infiltrate your grow.
Transplanting your clones:
When transplanting your clones into their final resting pots, it is important to treat the root ball and rooting area directly with Mycorrhizal. I have used many different mycorrhizal inoculants in the past, but the root mass on my Wonka Bars was absolutely incredible. I found out that was the result of DynoMyco. Thanks to our friend @trippyterpenes, we will be using DynoMyco mycorrhizal on our seeds and clones moving forward. Mycorrhizal inoculates help with the uptake of macro and micro nutrients for your plants. Healthy roots mean healthy plants and healthy plants mean healthy yields.
Welcome Home!
When your clones have been treated for pests and problems, they have been transplanted into their new pots, and roots treated with mycorrhizal, then you can bring your foster children into their new home and begin their journey to becoming your stash.
In the next episode, we will check on our new seeds, talk about fimming and topping our plants, and taking clones for future cropping. Happy Growing!
Everything up until now has been sourced at the lowest cost possible online including delivery, for use with the techniques discussed here. There will be variables, price changes, and delays. Thankfully we are partnering with Sea of Green, located at 1828 E University Dr #11, Tempe, AZ 85281. We want to make sure you have the knowledge and equipment needed to succeed. The goal of growing great at-home cannabis is shared, and we will be doing more with @seaofgreenaz to accomplish that goal. That said, every budget and build will differ as will a result. Keep a record of what you encounter to repeat for success later, or change course after facing an issue. Stay tuned for when we cover our move into cones along with veg, and please share your personal grows, any ideas, or questions with us! We will also tackle our flowering area and equipment with Sea of Green and Volt Lighting, @voltgrow, in our next installment!
Recommended Listening: 18 A.D. by Queens of the Stone Age Recommended Listening: Blinded by the Light by Manfred Mann’s Earth Band

Adrian Ryan was born in New Mexico and attended school since elementary in Arizona, his time growing up split between the two states. He hopes to work towards recreational cannabis, enjoys reading, writing, film, music, and also writing music.


Opmerkingen